Friday, May 21, 2010

2 New Features PDFs and Flash Photo Gallery

Just added 2 new features, PDF uploads and a new Flash Photo Gallery option.
Click on "Web Site Admin" and look for the link labeled "Add PDF Documents To Your Web Pages". Once a PDF is uploaded, you can paste the link to it into any of your custom web pages.

The new Flash Photo Gallery option can be added to your site easily.
Here is a sample link to the way the new Flash Photo Gallery looks.
KubotaDeals.com

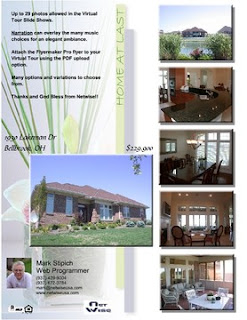
Currently this feature is only available for the listings that you create manually each time you make a (user uploaded) flyer.
We are looking at a way to add it for the MLS listings in the future.

Stay tuned...

If you want to try adding the Flash Photo Gallery to a page, copy and paste the following code into one of your pages:

<object width="500" height="250" data="featured_gallery.swf?MLNumber=6865" type="application/x-shockwave-flash">

<param name="id" value="featured_gallery" />

<param name="align" value="middle" />
<param name="allowScriptAccess" value="sameDomain" />
<param name="quality" value="high" />

<param name="wmode" value="transparent" />
<param name="bgcolor" value="#7C8BB2" />
<param name="src" value="featured_gallery.swf?MLNumber=6865" />

<param name="name" value="featured_gallery" />
</object>
</div>


Notice the code above where you will see "MLNumber=6865". Each of your (user uploaded) flyers will have an identifying number.
See (Details Page)
The identifying number for this listing is "3689". Just change the number to the one you want in your inventory of (STAND ALONE (non-MLS)) flyers.

You can find the link to each of your user uploaded listings on the page where you access your flyers, both MLS and (STAND ALONE (non-MLS)).
The Non-MLS flyers will have a link labeled "See Web Page (Default User)".

One more note, each photo in the (STAND ALONE (non-MLS)) flyers can have it's own description which is what you will see in the sample "description" link in the Flash Photo Gallery.

Oh, and there's more:
You can embed links to the PDF's (mentioned above) into the description for each photo.

As usual, please don't hesitate to call if you have questions. We're here to help!

<0
      < )
<|

Monday, March 22, 2010

Create your own count down callout on your web site.

I have posted a page that presents a nice little count down clock on your web site that tells the visitor how many days, hours, minutes, seconds until the $8000 Home Buyer Tax Credit offer runs out.

Here is the way your script will appear:


If you would like the preview the live demo and download the code, go to
CountDown Script Download

See Sample Code Below

Friday, March 12, 2010

Getting a JPEG image of your flyer.

When you want a jpeg image of your flyer, click on the PRINT button where you will see a button labeled "Create JPEG Image". If you click the button, you will see a progress bar and then a new window will open up. The new window will then take approximately 20 seconds to finish the process of create 2 jpeg images of different sizes.

Small


and Large

After the images appear, you can save a copy to your hard drive by "right-clicking" on the image and select the "Save Image As" option.
In FireFox the pop up window looks like:

€ Euro Symbol Usage

A question came up yesterday about how to use the Euro Symbol ( € ) in our FlyerMaker Template editor.

The answer is to just drag your mouse over the Euro sign and copy it. Then paste it into the mini-editor.


Please note: The Euro symbol will appear only if you use either the Arial or Times fonts.


To access the mini-editor for any text field, just hold down the "Shift" key and click on the text field.

Saturday, January 2, 2010

Add you own Background Images to the flyers.

Here is a video tutorial of how to upload your own background images to the flyers.
Video Tutorial for Uploading Background Images

Note some of the following tips:
Some users may want to create a letter head type background that places a few custom graphics in various places on the flyer.

The images you choose for the backgrounds can be of any size. When you upload the graphic you then will be presented with the option of cropping out the portion you want to keep. The resulting background will be saved and resized to 576px × 719px. This ends up being a letter sized 8.5 x 11 inch image.

Since the image will be resized, it is not meant to show at high resolution so if you have very detailed type setting embedded in the image, you may not get the expected print quality you need.

For high resolution type setting, it's best to use the free form type text fields that can be added to your flyer. You can add as many as you need to label any part of the flyer with the added benefit of using different fonts and font colors.